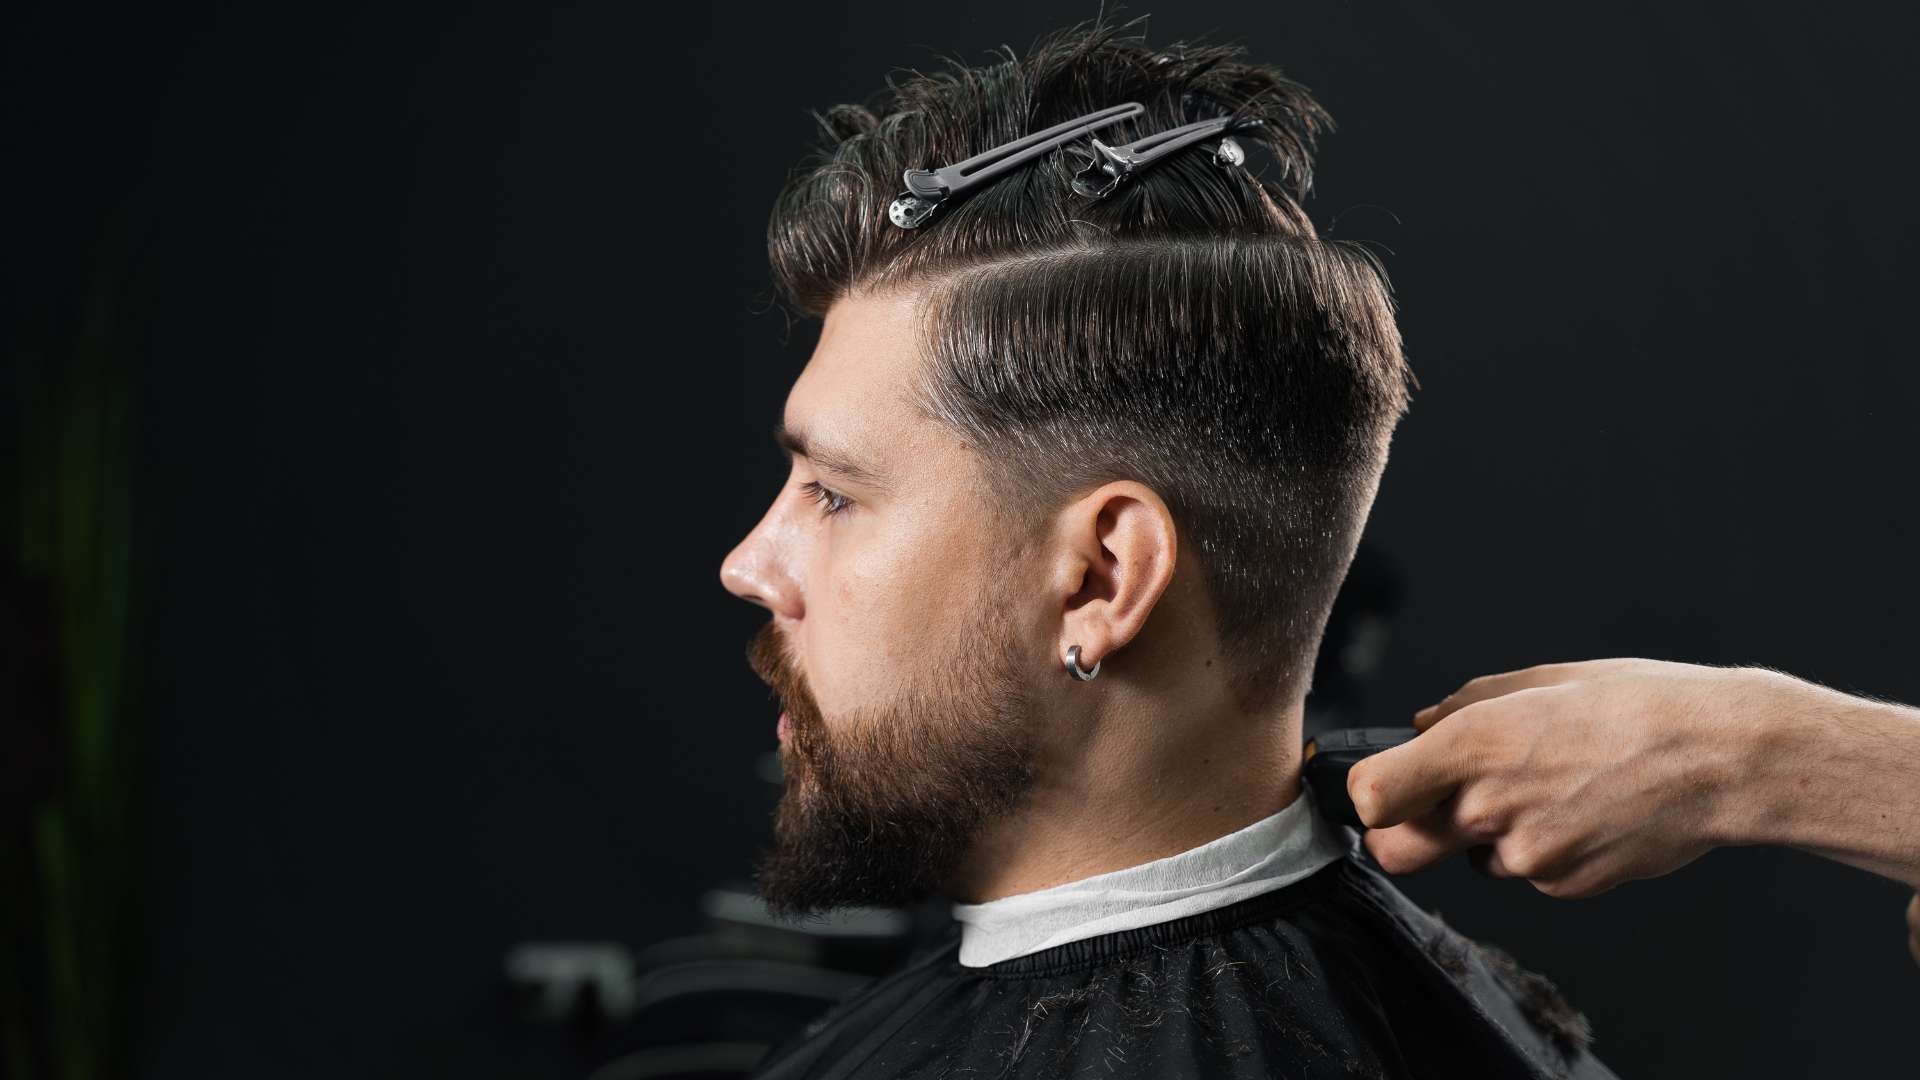
Achieving a perfect fade haircut is a skill that requires patience and the right technique. This guide breaks down the process into ten simple steps. Whether a professional barber or someone trying at home, these steps can help create a clean, sharp fade. The goal is a seamless transition from short hair at the bottom to longer hair on top.
Step 1: Preparation is Key
The foundation of a flawless fade haircut lies in thorough preparation. Before beginning, it is essential to gather all the necessary tools to ensure a smooth process. The key tools include clippers with adjustable guards, trimmers, a comb, a cape, scissors (if needed for blending longer hair), and a handheld mirror to check all angles. Each piece of equipment should be in good working condition; dull blades or malfunctioning tools can result in uneven lines and a poor-quality cut.
Additionally, the client’s hair needs to be clean and completely dry before starting. Washing and drying the hair before the haircut removes excess oils, dirt, and styling products, which can interfere with the clippers’ ability to smoothly glide through the hair. It’s important to avoid using clippers on damp hair, as it can lead to inaccurate cuts and uneven fading.
Positioning and lighting are also crucial elements of preparation. A barber or individual cutting the fade at home should ensure they have a proper setup, whether it’s a dedicated barber chair or a non-restrictive sitting area. The lighting must be bright and evenly distributed, illuminating the hairline and sections of the fade clearly. Poor lighting can easily lead to misjudging the length and transitions in the fade, compromising the overall look.
Finally, for the comfort of both parties, secure a cape around the client’s shoulders to catch loose hair and prevent irritation. With the tools laid out and everything primed for the process, the next step is to discuss the style of fade the client desires.
Step 2: Consulting the Client on the Fade Style
Before picking up the clippers, it’s vital to fully understand the client’s preferences and vision for the haircut. The fade is a highly versatile style, with variations such as the low fade, mid fade, high fade, skin fade, and high-top fade. Each option creates a different aesthetic, catering to varying personal tastes, hair types, and lifestyle needs.
Initiate the consultation by asking about the client’s definition of a good fade. For instance, a low fade begins at the base of the hairline and gradually blends up. It’s subtle and conservative and works well for individuals who prefer a soft transition. On the other hand, a high fade starts much higher on the head and offers a bold, edgy look. Skin fades, which involve shaving the fade down to the scalp at the shortest points, require more precise technique and maintenance, while high-top fades leave a sharp contrast between the short sides and the voluminous hair at the crown.
To ensure alignment with expectations, involve the client in the planning stage. This may include using visual aids, like a picture, to pinpoint their ideal style or recommending a fade that complements their head shape and face structure. Beyond the appearance, discuss practical considerations such as maintenance routines and the frequency of touch-ups. A detailed consultation not only sets the client’s mind at ease but also avoids any miscommunication, ensuring satisfaction with the final look.
For those offering professional fades, such as in a premium haircut in New York, consultations are often in-depth and completely tailored to the client’s personality, profession, and hair texture. Professionals may suggest enhancements like adding a part, detailing with a razor, or including designs to make the fade uniquely stylish.
This preparation phase—both in gathering tools and understanding the client’s preferences—sets the tone for executing a perfect fade haircut in the subsequent steps.
Step 3: Establishing the Guideline
The first step in the actual execution of a fade is establishing the guideline, which serves as the foundational blueprint for the haircut. This guideline represents the shortest length of the fade and is usually achieved using a clipper without a guard, also known as the “zero” setting. The guideline is crafted around the perimeter of the head, typically starting at the temples and curving around to the back of the head, ensuring symmetry on both sides.
The placement of this guideline is critical because it directly determines the fade’s style and appearance—whether it will be a low, mid, or high fade. A low fade starts closer to the base of the hairline, keeping more of the sides intact and resulting in a subtler and more conservative transition. A mid fade begins slightly higher, near the midpoint between the ears and the top of the head, providing a balanced and versatile look that works for a variety of styles. A high fade, on the other hand, starts much closer to the top of the head, offering a dramatic and trendy contrast between the longer hair on top and the shorter sides.
To achieve this symmetry and precision, barbers often use combs, clips, and mirrors strategically to section off and align the hair on both sides. Marking this initial line evenly is crucial since it acts as the anchor point for the rest of the fade. An uneven or poorly placed guideline can throw off the balance of the entire haircut. Lighting is also important—many professionals ensure their workspace is well-lit to clearly see the client’s hairline and texture. Establishing the guideline with steady, confident strokes sets the stage for the fade’s transition and ensures a clean, polished result.
Step 4: Mastering the Fade with Proper Styling Techniques
Once the guideline has been set, the process of crafting the fade begins. This step involves blending the lengths of the hair smoothly from the shortest point at the guideline up to the longer, uncut hair at the top. The key to achieving a seamless fade lies in using clipper guards of increasing lengths while employing precise and controlled movements.
Starting just above the guideline, the barber uses a clipper with a guard that is one or two settings higher than the previous level. The clippers are guided upward in a flicking motion, which involves lifting the wrist slightly outward at the end of each stroke. This wrist flicking technique helps soften the harsh lines between lengths, ensuring the hair transitions smoothly without creating a stark demarcation. Each pass should be deliberate and consistent, as rushing through this process can result in uneven blending or missed spots.
Barbers typically work in small sections, taking the time to inspect their progress from multiple angles. Mirrors are often used to check the symmetry of the fade and ensure it looks natural from all perspectives. Clipper-over-comb techniques might also be employed to further refine the edges and clean up any lingering lines. For more advanced fades, such as those with intricate designs or razor detailing, additional tools like trimmers or edgers are used to create precise shapes and accents.
Consistency is the cornerstone of this step. Barbers must maintain steady hand pressure and remain mindful of the hair’s natural growth pattern while cutting. Hair textures can vary widely, from straight to curly, and understanding how different textures respond to clippers is essential for achieving a smooth transition. Additionally, clients with thick or dense hair might require more passes to ensure an even result.
Proper styling techniques also include adaptability. Adjustments to the guard length might be necessary in some areas to accommodate the client’s head shape or to enhance the fade’s overall appearance. This nuanced approach ensures that the fade not only looks polished but also complements the client’s individual features and preferences.
By mastering these techniques, barbers can create a fade that appears clean, professional, and effortless. The key lies in patience, precision, and an acute attention to detail throughout every stage of the process.
Step 5: Blending the Sides
After the initial fade is established, the next critical step is blending the sides seamlessly into the longer hair on top. This phase determines how cohesive and balanced the overall haircut will look. The clipper-over-comb technique is a popular method used for this purpose. To perform this technique, barbers position a comb at an angle against the scalp, lifting sections of hair to the desired level. Clippers are then run across the comb, carefully cutting the hair and ensuring a gradual transition between the faded sides and the longer top. This method offers greater control and allows for a more tailored blend.
Alternatively, larger clipper guards can be used to achieve the same effect. Begin with a slightly longer guard size than what was used during the fade to bridge the gap between the top and sides. Move the clipper in smooth, deliberate strokes, working in layers and constantly checking for uniformity throughout the head. Regularly stepping back to assess the haircut as a whole is vital to catching inconsistencies and preventing any abrupt lines from appearing. Blending the sides requires patience, precision, and thorough attention to detail, but it is this effort that achieves a natural-looking gradient.
To refine the blend further, barbers can use thinning shears to soften the transitions and remove bulk. Run the shears carefully over heavier areas to break up any remaining harshness. The ultimate goal is a seamless connection between the faded sides and the top that looks polished and flows effortlessly with the client’s natural hair growth.
Step 6: Defining a Cleaner Neckline
The neckline is often overlooked but plays a significant role in the final presentation of the haircut. A sharp, well-defined neckline instantly elevates the fade, giving it a clean and professional finish. Begin by using a trimmer to outline the hair at the back of the neck. The shape can vary depending on the client’s preference—natural, rounded, or squared. Each option has its own aesthetic appeal and should be chosen based on the client’s personal style and hair type.
For a natural neckline, follow the natural hair growth, keeping the edges soft and organic. A rounded neckline involves gently curving the hairline for a polished yet less rigid look, while a squared neckline creates sharper, more angular edges for a bolder appearance.
Ensuring symmetry is crucial during this step. Use a mirror or step back frequently to check that both sides are even and balanced. Crisp, clean lines are key to creating an elegant cleaner neckline, so take the time to refine any uneven areas with precision. After completing the outline, clean up stray hairs around the nape using a foil shaver or straight razor, achieving a smooth and pristine finish. A well-defined neckline ties the entire haircut together and leaves the client with a highly professional appearance.
Step 7: Trimming Around the Ears
Trimming around the ears is the final detail work that perfects the haircut and ensures a sharp, polished look. This delicate task requires precision and a steady hand to create clean edges and a defined shape. Using a trimmer, carefully outline the area around each ear, removing any stray or excess hairs that extend beyond the natural hairline. Start by angling the trimmer along the curve of the ear, moving slowly to achieve clean and symmetrical lines.
Pay close attention to the space where the sideburns meet the area above the ear. This transition should flow naturally into the overall fade without any harsh lines or abrupt changes in length. For more intricate detail, some barbers use a straight razor to refine the area further, ensuring an ultra-crisp finish.
The shape created around the ears complements the sharp neckline and provides a cohesive look to the lower portion of the haircut. A precise trim in this area not only enhances the fade but also accentuates the client’s facial features. Taking the time to perfect this step guarantees a completed haircut that feels both meticulous in craftsmanship and professional in appearance. Clean, sharp details around the ears serve as the finishing touches that separate a standard haircut from a truly exceptional one.
Step 8: The Final Look at a Barbershop
The final detailing is what separates a good fade from a truly great one. At a New York barbershop, this step is approached with precision and an unrelenting focus on perfection. The barber carefully inspects the entire haircut, checking for any missed spots or uneven areas within the fade.
Absolute symmetry is a priority, as even the smallest imbalance can affect the overall aesthetic. The edges around the forehead are meticulously cleaned up to establish a sharp, defined hairline that frames the face perfectly. Similarly, sideburns are shaped to match the contours of the fade and the client’s facial structure, ensuring a seamless flow. This process is not rushed—it requires patience and a discerning eye for detail. Such meticulous grooming is a hallmark of a top-tier New York barbershop, setting the standard for excellence and leaving clients with a polished, professional result that reflects the skill of their barber.
Step 9: Style the Top
While the fade serves as the foundation of the haircut, the styling of the top is what brings it all together and allows the client’s preferences to shine. Depending on the desired look, this step can involve a variety of techniques. If the client opts for a polished appearance, the barber may use scissors to create a sharp, clean-cut style.
For added texture and dimension, techniques like point cutting or texturizing are employed to create layers that add depth and movement. Hair products, such as pomades, waxes, or creams, are selected based on both the client’s hair type and preferred finish, whether it’s a glossy pompadour, a sleek side part, or a natural, tousled crop.
Styling tools like combs, brushes, and even blow dryers may be utilized strategically to achieve the final look while maintaining volume and control. This step is tailored to highlight the client’s individual style and elevate their overall appearance, ensuring they leave the barbershop feeling confident and refreshed. It’s this careful balance of technical skill and creative expression that solidifies the top as the standout feature of a truly exceptional haircut.
Step 10: The Finishing Touches
The final step of the haircut process is where everything comes together, and the client’s look is polished to perfection. Begin by thoroughly removing any loose hairs from the client’s face, neck, and shoulders. Loose hairs can create discomfort or an unfinished appearance, so using a neck duster is particularly effective at ensuring the client leaves the chair feeling clean and refreshed. A soft-bristled neck duster is ideal for gently sweeping away stray hairs without irritating the skin. For extra precision, pair the neck duster with a light dusting of talcum powder, which can help absorb moisture on the neck and make the process more comfortable.
Next, add definition to the style by applying a small amount of a suitable styling product. Depending on the client’s desired look, options like pomade, wax, or styling cream can be used to enhance texture and hold. Start with a minimal amount of product to prevent creating a heavy or greasy appearance, warming it between your hands before evenly distributing it through the hair. For a sleek, polished style, use pomade to create shine and hold, while wax is better suited for achieving a more casual, textured look. Make sure to work the product through evenly, focusing on areas that might need extra control or definition. This final touch ensures the haircut stays in place while showcasing the craftsmanship of the cut.
Once the styling is complete, take the time to ensure the client is fully satisfied with their haircut. Using a hand mirror, show the client the back and sides of their head, as these areas can often go unnoticed without assistance. Maintain open communication by asking for feedback and addressing any concerns they might have. If adjustments are needed, this is the moment to make them—whether it’s refining a blend, trimming stray hairs, or reworking the style slightly to better match the client’s preference. This step not only ensures the client is happy with the result but also demonstrates your commitment to providing exceptional service.
Conclusion
Following these ten steps ensures a consistently perfect fade haircut that both the stylist and the client can be proud of. The process relies heavily on using the right tools, executing proper blending techniques, and paying meticulous attention to detail at every stage. Each step builds upon the next, from the initial consultation and preparation to the precision of the fade and the polish of the finishing touches. It’s worth noting that practice is crucial in mastering these techniques. Over time, with experience and dedication, your skills will grow, and you’ll be able to achieve a flawless fade every single time. Offering this level of quality and care is what sets a skilled barber apart and keeps clients returning for their next haircut with confidence and anticipation.


